Archive for ‘Projects’ Category
Browse:
Projects »
Subcategories:

Building a Guild Site

datePosted 4:19 PM, August 14th, 2011 by MarkleB

Apparently I haven’t got the hang of having a baby and finding time for projects.

One project I did find the time to do recently was create a guild page for the upcoming Star Wars: The Old Republic MMORPG. It’s almost unnecessary, though. Even pre-launch, the game offers default guild pages for members of the site, and includes forums (public and private), Message of the Day, Mission Statement, and Roster Management. It looks like the roster management functionality will actually have interaction with the game to actually manage your membership from outside the game. Also, in allowing you to create your guild early, the developers will try to reserve the name of your guild when the game launches, if you have four pre-order members in the guild early enough.

Our guild is Korriban Council. Whether or not we get to keep the name is up in the air, since there was an earlier guild with the same idea. That didn’t stop me from dropping $10 to register the domain name, though. (Because, of course, I have an illness. And every time a remotely good idea for a website name pops into my head, I register it compulsively. Witness this site.) So far it’s co-workers and my sister.

[Thank you for joining me for a moment in Tangent Corner, the part of my article which really has absolutely nothing to do with the rest of whatever it is that I’m talking about. Today’s topic: Why Sith? There are a few reasons. Chief among them, Jedi are a bunch of whiners. Or is it Jedis? I know the plural is written down in a book or on the Wookiepedia or off the top of every Comic Con attendee’s head. Whatever. The point is, they’re a bunch of whiners. The Jedi, not the awesome Comic Con attendees. “But I was going into Toshi Station to pick up some power converters!” “She’s forgotten me completely!” Whiny little whelps. My guess is that while not everybody who chooses to play a Jedi will be a whiny force-jockey (to be fair, a lot of cool people have been waiting years to play a Jedi in this game), every whiny force-jockey will choose to play a Jedi. On the flip side, jerks are going to be more likely to play Sith, all gankers are jerks, so most gankers are going to be Sith side. It’s just logical that if you want to avoid getting ganked, grab a red light saber.]

Anyway, back to the guild page. I didn’t want to just plug in some data at an existing guild-portals-R-us site and call it a day. I like having control over things (Sith, remember?), I like having things unique, and I like figuring out thinks I didn’t already know. Site building is always a learning experience, because I’m rather awful at it. (Again, witness this site.) I’d built a partial guild page for someone else before, but they wanted it based on a forums-centric CMS that made managing non-forum content nearly impossible. It took forever to get changes in, so it had very few features.

To start with this time, I chose my favorite Content Management System: Drupal. With enough work, Drupal can be anything you want it to be. With a few structure customization modules it’s even fairly easy.

Let’s be honest about Drupal though: Out of the box, its ugly. Not just its default themes (which are kind of nice, really, just a tad plain), but its built-in modules are feature-sparse. People often complain on their forums about how crappy the forums in Drupal are. Invariably, some nimrod responds with, “The forums you’re using now are the core Drupal forums!” This leaves everybody so dumbfounded that someone would be PROUD of this that the complainers go away and never come back. Probably switch to Joomla! along the way. (Which is also a nice CMS, but the really great modules are generally not free … but you do tend to get what you pay for.)

So I had to heavily modify Drupal to get it to be my guild site. Here are the things I’ve added to it and how I did it.

Custom Theme:
I started with the Zen theme and modified the CSS. In one case (polls) I had to go a bit further. I modified the .php for poll bars to include an extra div element, so I could use an image as a background overlay. Most of the theming I did used functions that are only available in current-generation-web-browsers-which-are-not-Microsoft-Windows-Internet-Explorer. Honestly why people use IE is beyond me, not that many do. Currently about 5% of my traffic comes from IE browsers. But even that beats the pants off of Apple Mac or i OSes. I evidently have nothing to offer hipsters, thank goodness. Anyhow, if you look at the site on IE 6, IE 7, IE 8, or IE 9, the site displays in four different ways, none of them right. If you look at the site on Firefox, Opera, Chrome, Safari, or even a NookColor, they all display the same.

Anyway, I suck at theming (once again, witness this site) but I at least managed to stick with it this time.

Forums:
I toyed with the idea of having a third-party forum and just tying user accounts to it, but I really hate when I’m on a site and the forums have no awareness of the site, and the site has no awareness of the forums.

I loaded up the Advanced Forums module. It was more “Advanced” in Drupal 6 than it is now (because of other modules like the Author Panel and such) but it’s head-and-shoulders above the seemingly random list of articles that they call posts in core Drupal.

I haven’t 100% completed theming the forums, but they’re good enough for a start.

Roster/Member list/User profiles:
Okay, so this isn’t as cool as the official SWTOR roster, since it won’t actually have in-game impact (though I’d love if they released some kind of API to allow me to do that), but it’s nice enough.

I used the Views module to create a list of current members on the board (minus the Admin account), gave a default icon Heheheh ... and called it a day.

When clicking on the users it shows their name, picture, the most recent forum topics they started, and the most recent comments they’ve made. I created each piece of the profile separately with Views, then tied the multiple Views together with the Panels module. Nobody told me I needed Panels, so let me help you: If you have a Drupal site, you need Panels. Just get it, you’ll find a use for it later.

Screenshot Gallery:
Since the game hasn’t started yet, this is currently empty, but it works and it works well.

I created a Content Type called Screenshot using core Drupal 7 functionality, because CCK (Custom Content Kit) is the ONE thing they’ve actually finally moved to Core Drupal. It’s like an article or a blog post, but all it lets you do is upload a picture with a one line description. You can’t even give it a title, because I used the Automatic Nodetitles module to automatically give it the title of the user who uploaded it and the date/time they did so. The images are then resized downward to a maximum size of 1600×1200 because yes, some people game on insanely sized multi-screen displays.

Then I have a View set up that checks for all the posts of type Screenshot, displays thumbnails of them in a grid, and puts a nice title underneath them.

Very simple to set up, but it works nicely. (I had previously built an Entire-Gallery-As-A-Single-Node pseudo-module that I may re-introduce into this site later, but for now I really like having just a Screenshots gallery.)

Voice Chat:
Oh, this one was cool. The Voice Chat isn’t really built into the site. The site just displays the current status of our TeamSpeak3 server.

I had actually built this to work with Ventrilo, but all the work I’d put into that was thrown down the drains when I realized that Ventrilo will only let you host 8 people simultaneously unless you rent space on someone else’s server. You can’t license it for more and run it on your own server. Since the point of having a voice server is to coordinate during raids, and you’re going to need more than 8 slots, we had to move over to TeamSpeak3.

The bright side is that I had to do a lot more work to get Ventrilo to work than TeamSpeak3. TeamSpeak3 has a query tool built into it, while Ventrilo requires a second program to be installed. Also, I had to do the PHP from scratch with Ventrilo, and with TeamSpeak3 I found TSStatus. This saved me at least a day of figuring out all the hooks myself.

I did have to modify it a bit. I couldn’t figure out why it had been programmed to build links with javascript, so I re-wrote them to simple PHP. If anybody’s curious in doing the same, here are the changed lines in tsstatus.php:
$link = "ts3server://$this->_host:".$this->_serverDatas["virtualserver_port"]."?password=********&channel=".htmlentities($channel["channel_name"])."&nickname=$this->uname";

$out .= '<div class="tsstatusServerName"><a href="ts3server://' . $this->_host . ':' . ($this->_serverDatas['virtualserver_port']) . '?password=********&nickname='.$this->uname.'"><img src="' . $this->imagePath . '16x16_server_green.png" />' . $this->_serverDatas["virtualserver_name"] . "</a></div>\n";

I put the HTML that was generated from the tsstatusgen.php file directly into a block in Drupal, and added two lines, “global $user;” and “$tsstatus->uname = $user->name;” and then added “public $uname;” to the tsstatus.php file so that when a logged-in user clicks on the links, it automatically logs them in using their board name as their TeamSpeak3 name.

Still to be added:
I’d like to handle applications for the guild through a web form. I’ll probably just extend the base profile/user account/registration questions and turn it into an application, a registration, a user account page, and a profile page. It’s already halfway there already.

I’m NOT going to put a shoutbox in. I honestly can’t figure out the point of those things.

Now, sadly, it’s all about content. Which is going to be more difficult to find time to post … Because … One last time … Witness this site.

Father’s Day Geek Projects

datePosted 2:05 PM, June 18th, 2011 by MarkleB

I’m not a geek by accident. I was raised a geek. My father was a geek and his father before him was a geek, only he wasn’t called a geek, because “geek” meant something different in his time that would land you in a side show.

I’ve been having a difficult time with a lot of different aspects of my world, lately. My father passed away unexpectedly in March. I owe most of who and what I am to him, especially the part with a terrible sense of humor.

He introduced me to the Geek Project. He was always using fun techniques to teach my siblings and me new concepts in a way that would help us remember them and hold our interest.

As an important side note, his ideas weren’t always the safest. He had a different concept of “safety” than the rest of the world. At one point he actually got prescription safety glasses and wore them every day from then on. Every time I called him for help on something, he’d start by telling me how he’d done it in the past, then conclude with, “But you probably shouldn’t do it that way. Saying it out loud, it doesn’t sound very safe.” (He read my article on the baby swing hack and advised me that our home would likely burn down until I asked him to explain the math behind his worries.)

This Father’s day will be one of extremely mixed emotions. It will be my first Father’s day as a father, and my first Father’s day without a father. I think this article will fit both topics.

These are three projects my dad did with me when I was very young. They’re changed slightly to make them easier and “safer.” (One originally called for getting tubes made of soda lime glass then cutting, melting and blowing them.) They’re still not all entirely safe. There’s only so much you can do when dealing with projects from the mind of a man who figured it was probably for the best if his eyes had safety glass in front of them at all times. So … You may not actually want to do them.

Let me re-emphasize: You’ll probably end up dead, blind, or both if you do these.

They’re also all cheap, which balances out safety concerns! They essentially use trash, which I’m always keen on. (Not really, I just enjoy looking for reasons to use ‘keen’ in a sentence because I think it’s a nifty word.)

They are: a Cartesian Diver, a Soda Can Flyer, and a Pinhole Eclispse Viewer.

Cartesian Diver

Cartesian Diver with a bonus shot of the Soda Can Flyer

  • Time: Five to ten minutes
  • Cost: Pretty much made out of garbage, so close to free
  • Most difficult part: Using a hot glue gun

Materials:

  • Pen cap (Biro/Bic/Any pen cap that has a dangly bit)
  • Anything to add weight to the dangly bit on the pen cap (paper clips, clay, other assorted trash)
  • Transparent water or soda bottle with cap
  • Glue gun glue
  • Water

Tools:

  • Hot glue gun

Oddly enough, I never got to do this in any school class, and never saw it on Mr. Wizard. (To be fair, my dad only showed us the Mr. Wizard’s World episodes from the 80’s. He never got us the Watch Mr. Wizard episodes from the 50’s.) My dad did this experiment/project with glass tubes made of flint glass. He used a propane torch for 90% of his projects, so he was always prepared for glass blowing. The major advantage of blowing a small bubble on one end of the glass tube while leaving the other end opened but slightly melted to smooth it is that it’s easier to draw faces on the bubble than on a pen cap.

Most pen caps have holes in the top of them, so this is what the glue gun is for: Seal off the holes in the top. This will keep the air to keep your diver buoyant.

Quick and simple: Fill the bottle with water, not quite to the top. Weigh down the pen cap, and leave it with just enough air in the top of it so that it is barely floating.  Screw the bottle’s cap on tightly. Squeeze and unsqueeze the bottle.

The cap should dive down to the bottom of the bottle when the water pressure increases, then rise back to the top when the pressure goes back down again. (Depending on the amount of air in the cap, you may have to squeeze harder.)

[Cartesian Diver video]

If you don’t want to bother with the pen cap, you can try ketchup packets or wooden match sticks with the tops cut off, but you’ll have to squeeze much harder.

Soda Can Flyer

  • Time: 5 to 10 minutes
  • Cost: Once again, garbage
  • Most difficult part: Using a rotary cutting wheel to cut a straight line

    Behold! Yes, you will bleed to death.

Materials:

  • Soda can

Tools:

  • Rotary tool (Dremel) with cutting wheel
  • Can opener
  • Safety glasses (this can be ignored if your every day glasses are OSHA approved safety glasses for whatever reason)

It’s a soda can that flies. You may know this under the commercial names of Toobee, X-Zylo, Turbo Tube, Dragon Ring, etc. I’m calling it a flyer because none of those companies call it a flyer. My dad showed me how to make these further back than at least one of those companies existed.

Maybe it’s just  my can opener, because I don’t remember any that could do this from when I was a kid, but the can opener takes the top off a soda can perfectly. It leaves no jagged edges like the ones that threatened to slice off my thumb as a child. Looking back, I’m probably lucky my dad didn’t just hand me a rusty sword and challenge me to how closely I could look at it while running at top speed.

If your can opener isn’t as cool as mine, you’ll have to do two things: 1) Be jealous, 2) Find your own way to get the top off.

Next, use your favorite rotary tool attachment to cut the can about 2 1/

2″ down. (For European/Red Bull sized cans you’ll want to cut around 5 1/2 cm down, but the narrow opening won’t let a lot of air through so they won’t work very well. For giant energy drink cans you’ll probably want to cut about 3″ down, and they may be a lot easier to throw.) Do your best to file the edges. Or not. Either way, you’re probably going to wind up like Mr. Dalton, my junior high school wood shop teacher, who had fewer fingers than I’ve had cars.

And throw! Outside. After lots of practice. How? Like a football. An American football. Throwing it over your head with both hands like a soccer ball won’t get you anything but laughed at. By me. If you’re having troubles, check out Toobees on YouTube. And follow them back to their home page and buy one there, so you won’t slice off your fingers like that guy in Mad Max catching the kid’s boomerang. (Man, that scene always gets a giggle out of me.)

[Soda Flyer video]

Or you can just make it with paper and tape: Fold down an edge of the paper with a thick seam over and over and over. Tape the two sides perpendicular to the folded edge together, so you have a tube with the top being extra thick. Throw. (Again, as the appropriate sports ball mentioned above.)

Pinhole Eclipse Viewer

  • Time: 10 to 15 minutes
  • Cost: Still garbage
  • Most difficult part: Finding a use for it (seriously, we’re talking cutting and taping)

Materials:

  • Soda can fridge pack, or other long box or cardboard tube (Why Diet Dr. Pepper? Because now Diet Dr. Pepper tastes more like regular Dr. Pepper. Now back off!)
  • Aluminum foil (or aluminium if aluminum is not available in your country) (Full disclosure: I like to use wrappers from Rolos, as it gives me an excuse to buy and eat Rolos.)
  • White paper
  • Masking Tape

Tools:

  • Scissors or precision hobby knife
  • Pin or needle

This is a box you can use to “safely” watch an eclipse. Truth be known, I don’t know how much I trust watching the reflection of the sun off of white paper, because white paper is nearly as pale as my skin, and I KNOW it can’t be safe to see the sun reflected off my back. Ask my wife.

The longer the tube, the larger the sun’s reflection will be. With the fridge pack, it’ll be about 1/8″, so be prepared to squint.

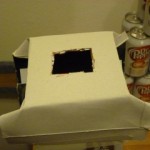
On one end of the box, cut a small square, smaller than your square of foil. Tape the foil over the square. Using the pin, poke a tiny hole into the foil. (My fridge pack box had some holes, so I used another box to matte out the holes. I could have just covered the whole end with foil instead.)

On the other end of the box, inside, tape a white sheet of paper. This will be the area on which the sun will be reflected.  On the side of the box near that end, cut a small view port.

That’s it. Face away from the sun, point the end of the box with the foil on it toward the sun. (Seriously, don’t look at the sun to line this up, what were you thinking, you knew better than that.) Look through the view port at the sheet of paper, and you’ll be able to watch the eclipse as it happens.

Now, this is an extremely lame project and you can only use it as often as there is a partial solar eclipse. It can, however, pull double duty as a pinhole camera if you re-cover the viewing port, get some photo paper to replace the white paper, and turn your bathroom into a make-shift dark room.

This is the paper at the end where the sun will reflect

This hole could be muuuuch smaller.

I could have gone smaller on the pin hole, too.

The top of the box gets aimed at the sun, and if you look closely you can see the sun reflected as a small white circle. Had this been during a partial eclipse, it would have looked more like a cookie that I'd eaten part of.


Ultimate Baby Monitor (for geeks)

datePosted 8:09 PM, May 20th, 2011 by MarkleB

This blog is not dead. A very specific issue has made it more difficult to update, but hopefully I can turn that to a positive in a (fingers crossed) soon-to-follow entry. Hint: It involves a lot of soda. A soda can, a soda bottle, and soda glass tubing.

Anyway, for now, I unearth my Ultimate Baby Monitor. (Disclaimer: I’m a bit of a geek. “Ultimate” by my standards may not be ultimate by yours. It’s more likely that “ultimate” by my standards is mostly unusable by normal standards and a little pathetic to boot. And in cases of food, it actually just means I added cheese to it.)

As it is certainly not All Things To All Parents, I’ll highlight the quick pros and cons:

Pros:

  • Video monitoring
  • Audio monitoring
  • Infrared night vision
  • Wired or wireless (except power)
  • Pan & tilt camera movement remotely
  • 2-way audio (currently unimplemented, only under very specific circumstances, and I can not for the life of me figure out why you’d want to talk to your baby through your baby monitor)
  • Viewing available through smartphone anywhere you have data signal or WiFi access
  • Can record (again, under certain circumstances)
  • Motion detection alerts
  • And, of course price: $60. That’s pretty close to as cheap as you’ll find a video baby monitor

Cons:

  • Audio sucks
  • Slight delay, about 1 1/2 seconds over LAN
  • That $60 only covers the camera, for a receiver you have to use a computer, tablet or smartphone
  • Audio REALLY sucks
  • Not battery operated, will require power cord
  • Okay, so the audio sucks so much that my wife actually still uses the audio baby monitor we had before
  • To get audio on smartphone, you’ll probably have to pay for an app, and I haven’t tested that

So what’s the big secret to it? The camera.

First, a few things about the specific camera I linked to.

  1. That’s not the same exact camera I bought. I bought an even Brand X-ier camera. Like, it doesn’t just not list a manufacturer, but nobody on the Internet seems to be able to track it down. Worse, people don’t seem to care. It’s like a mystery so ancient that people refuse to look lest their faces melt off and Harrison Ford is forced to turn it over to the government.
  2. The one I’ve linked to is a generically packaged version of a Foscam camera. It is compatible with Foscam firmwares, so you can update it as new firmwares come out. (This is important as it has an internal web server for its user interface that’s based on its firmware.) For my camera, it won’t accept the Foscam firmware, I can’t find new firmware from the manufacturer (apparently an ancient and vengeful pharaoh), and I’m stuck with it. FOR LIFE. (It’s a B-series, for whatever that means.)
  3. Mine cost $4 less on eBay. Who’s laughing now?
  4. It ships from Hong Kong, so allow enough time for your baby to graduate college for it to arrive.

The same camera is about $100 on Amazon with faster shipping, and the price goes up from there.

I’ll stick with the $60, because it’s more fun to complain about waiting than … Well, just about anything.

Wait a few years, get the camera, unwrap it and … Well, good luck. Most of the different re-branders include installation CDs (with .DOC documents and what equate to Power Point Presentations), but they’re nearly as good as the ones that come with no documentation at all. If you’re used to configuring network-attached devices through web interfaces without instructions, this’ll be right up your alley. The default IP address of it is 192.168.0.178 (though some are on 192.168.1.178) on port 80, with the user name of admin and the password of 123456. (I have actually randomly found some of these on the Internet that still use this user name and password. Sadly, they’re mostly demo cameras and are invariably set up to watch a couch in Singapore 24/7. Possibly the same couch.) So if you’re using a different internal network than 192.168.0/24, you’ll have to change your computer’s IP address to find and talk to it. Potentially the “Camera Search” software that comes with it will find it for you, but I’m more likely to stick with changing the address.

Bizarre bonus configuration tip: Some of these come with Dynamic DNS pre-configured. There’s a sticker on the bottom that has the URL for your camera that it will automatically bind itself to. Plug the camera directly into your broadband modem, and configure it from a friend’s house or your smartphone using that address.

Configure it to an address that’s actually in your LAN’s network range, configure your router to forward a port to it, and you’re mostly done.

At that point, you could kick off Internet Explorer, install the ActiveX plugins, and watch and listen to the camera. And if you enjoy Internet Explorer … That’s probably all you need to do.

(Quick note: Internet Explorer with those ActiveX controls is the only way to get all functionality of the camera via a web page. This includes using the microphone on your computer to talk to people in range of the camera if you’ve connected external speakers, and recording video files off the camera. There are some stand-alone programs that come on the CD and others you can purchase that will also include this functionality.)

With the current firmware, the audio portion is (mostly) only available using the IE ActiveX controls. There are two work-arounds to this: You could use a Firefox plugin that displays Internet Explorer through a Firefox tab (which defeats the point of not using Internet Explorer anyway and isn’t possible in Linux), or you can use VLC Player.

The camera has a lot of hidden functions built into it. Most are accessed through hitting URLs in it and kicking off some CGI magic. I found out about these while working on my own Ultimate Baby Monitor project, and found somebody else’s.

He has the same Super-Brand-X-est camera that he maintains he discovered to be a Netwave IP camera while avoiding the fate of Nazi relic hunters. He found a PDF that contains some of these functions here.

The videostream.asf address will serve up both the video and the audio in a format that VLC Player (and mplayer) will accept. (It deceptively looks like Windows Media Player will accept it, but this is a trap. It is conniving and spiteful.)

There are a few other commands that I’ve found to be useful, too. By using videostream.asf and these other commands, you can build your own web page that will display video, play audio, and control the camera’s movement, and it will work in Internet Explorer, Firefox or Chrome, and will work in Windows or Linux.  You have to install VLC Player and its Mozilla plugin for this to work.

The idea for this page is that you embed the VLC Player into a web page, then include hyperlinks which send commands to move the camera up, down, left and right.

The page I’ve built for that does JUST these five things: Embed the player (once for IE, once for Firefox/Chrome) and move each of the four directions. You can easily pretty it up with buttons and backgrounds, and sparklies and flashies and super emo art and heavy music like your defunct Myspace page you haven’t looked at since you met your child’s co-parent.

Okay, it does one more thing, it embeds your user name and password in each of these things so that you don’t have to type it in. Obviously, you probably don’t want to actually publish the page to the Internet this way, just drop it on your desktop.

Without further ado, here’s the HTML for it:

<html>
 <header>
 </header>
 <body>
   <object classid="clsid:9BE31822-FDAD-461B-AD51-BE1D1C159921" codebase="http://downloads.videolan.org/pub/videolan/vlc/latest/win32/axvlc.cab" width="640" height="480" id="vlc" events="True">
     <param name="Src" value="http://YOURADDRESS:YOURPORTNUMBER/videostream.asf?user=YOURUSERNAME&pwd=YOURPASSWORD" />
     <embed type="application/x-vlc-plugin" name="VLC" autoplay="yes" loop="no" volume="100" width="640" height="480" target="http://YOURADDRESS:YOURPORTNUMBER/videostream.asf?user=YOURUSERNAME&pwd=YOURPASSWORD">
     </embed>
   </object>
   <p />
   <a target="camcontrol" href="http://YOURADDRESS:YOURPORTNUMBER/decoder_control.cgi?user=YOURUSERNAME&pwd=YOURPASSWORD&command=2&onestep=1">Up</link>&nbsp;
   <a target="camcontrol" href="http://YOURADDRESS:YOURPORTNUMBER/decoder_control.cgi?user=YOURUSERNAME&pwd=YOURPASSWORD&command=0&onestep=1">Down</link>&nbsp;
   <a target="camcontrol" href="http://YOURADDRESS:YOURPORTNUMBER/decoder_control.cgi?user=YOURUSERNAME&pwd=YOURPASSWORD&command=6&onestep=1">Left</link>&nbsp;
   <a target="camcontrol" href="http://YOURADDRESS:YOURPORTNUMBER/decoder_control.cgi?user=YOURUSERNAME&pwd=YOURPASSWORD&command=4&onestep=1">Right</link>&nbsp;
   <p />
   <iframe src="#" style="display:none" name="camcontrol"</iframe>
 </body>
</html>

Yup. Just HTML (almost). I’m old school like that.

Also: This is for my Brand-X Cam of the Covenant. For the Foscam and Foscam unbranded, you’ll want to switch up & down, and left & right. The controls are reversed between the two cameras.

Finally, there’s smartphones. The camera I got came with an Android app on the CD. It’s usable, but it’s tiny, doesn’t rotate … It’s not a very good app.

Instead, I’ve installed Tiny Cam Monitor Free, and am using the Foscam profile for it. It’s great, but again the movement controls are reversed. I’d consider paying for the audio version, but the sound really isn’t great anyway.  There are similar apps all over the place for the iPhone.  And if all else fails, the default built-in web page interface includes a Mobile style sheet that’s quite usable from the phone.

And that’s it. My wife enjoys firing up the smartphone app when she hears him stirring, and wants to see if he’s distressed enough to get out of bed. (Or if he’s standing in the crib, or even yanking on and chewing the power cord as she witnessed him do the first night before I’d thought better of it.)  I enjoy full-screening it on my second monitor so I can watch him sleep while I’m working from home.  One of the best parts is that it’s not wasted money. After he (and any yet-to-be-conceived siblings) outgrow the need for monitors, it’ll be a great component of a home security system. You can even set it to send e-mail to your text alerts gateway based on camera movement. Which might not work so great if you have a dog.  Oh, well. Still cool.


Baby Swing Hack

datePosted 11:01 AM, December 6th, 2010 by MarkleB

The baby swing hack is one of the first hardware hacks most new dads tackle. In fact, I first helped with the baby swing hack a decade ago, when a friend came up against the same problem with his new daughter.

The problem is batteries.  Manufacturer suggested retail price for a Fisher-Price Cradle n’ Swing ranges from $100 to $210, depending on features. Those that take only batteries start at $100, while those that also come with a power adapter (or place to plug one in) start at $140. The extra $40 is a lot to pay for a $10 power adapter. New batteries every other week would be even more expensive.

Hacking the baby swing to accept a power adapter is the low-cost solution. I’m not recommending anybody actually do this: I’m a bad parent, and this is just the way that I did it. While one of the easiest hacks I’ve ever done, please don’t do it without knowing your way around a soldering iron or without taking proper safety precautions. While this hack will allow someone to continue to choose either batteries or AC power, one should take out the batteries when using AC and not attempt to use both.

The first time I helped with the hack a decade ago, it was kind of a ThereIFixedIt solution. We literally soldered the AC adapter’s leads to the battery terminals, and it couldn’t be used any other way. (The father went back later and fixed it a little better, but I think the AC adapter was still permanently attached.)

This is a much more elegant solution … And also still a little kludge. The drawbacks:

  • I didn’t make it so that I could leave the batteries in while running it off of AC. Technically I could, but it would still drain the batteries, and it’d be a mess after the batteries ran out.
  • I wasn’t able to find a DC power jack and AC power adapter end that matched at Fry’s, and didn’t have the patience to order ones that would match. So I used a 3.5 mm microphone jack and plug. It works really well, but it might also get me laughed at.

Our swing is the Fisher-Price How Now Brown Cow Cradle n’ Swing (the 2-in-1, not the take-along swing). MSRP is $100, and you can probably find it for $90. We got ours as a dented box discount at the local Mattel Toy Store Outlet for $50 in perfect condition.  It takes 4 1.5V  D-cell batteries wired in serial, for 6V DC total power. One should use around 1.2 amps (1200 mA) for the power adapter, we settled on 1.8 (1800 mA) since that’s what they had in-store.  (Fisher-Price actually uses 700 mA adapters, but the 500 mA we first tried was massively under-powered.  An 800 mA adapter may do fine.)

We bought a universal power adapter for $15 (could have gotten it cheaper online), and a microphone jack and microphone plug-end for $0.89 each at Fry’s. So, here’s my project notes:

Baby Swing Hack

  • Time:  15 minutes
  • Cost:  $17
  • Most difficult part: Soldering wires, drilling holes

To determine if the hack would work, I wrapped a separate wire around each of the ends of the battery terminals. (Just the two at the ends of the battery chain.) You can see them here:

Hacked Baby Swing project: test leads connected

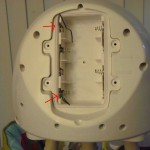
I carefully touched them to the ends of the power adapter (set to 6V DC), very careful not to cross them, and met with success.  I then unscrewed the back, and found this:

The insides of the baby swing. You can see on the upper right where the wires run to the batteries.

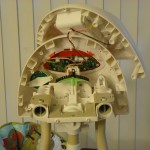
I probably should have gotten a few more pictures here, but it’s pretty straightforward.  I chose a place for the microphone jack that had plenty of electronics-free space behind it, drilled a hole, put the microphone jack in (the hole was so snug that I was able to just screw the jack in, and it was so tight a fit that it required pliers to do so), and soldered it in.  One trick here: Make sure you note which is the positive lead and which is the negative lead, and wire it correctly. I didn’t, so I had to wire the microphone plug onto the AC adapter backwards, too.  You can make out the microphone jack and the wires going to it in this picture:

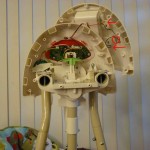
I then clipped off the end of the AC adapter, soldered the microphone plug plug to it, and that’s it. I don’t have a picture of the AC adapter, but it looks as professional as the baby swing does.  Here’s the end result:

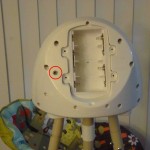
New power jack circled in red. Works perfectly, looks like it came that way.

The end product is a baby swing that has a power adapter (or can use batteries) for $67, instead of $140. If I’d ordered parts online, or found used parts, it would have been even cheaper. And the baby loves it. We’ll probably “hack” it a bit more, and securely put our own mobile at the top, as the one it comes with is fairly uninteresting … To me. Our child seems fascinated with it anyway.

Making Jack-o-Lantern templates

datePosted 12:55 PM, November 1st, 2010 by MarkleB

For carving cool Jack-o-Lanterns, the instructions in any pumpkin-carving tool kit will do. The steps of taping the template, dotting the pattern with a toothpick or pin, and the actual cutting are pretty standard. About the only additional tip that I can add is to get a pumpkin-carving kit that includes a scoop/spoon (or use something like an ice cream scoop), because these are awesome for scraping the pumpkin walls to get them thin. The thinner, the better for more complex carvings. (Also, this is a very rare occasion for me not to recommend getting something at the dollar store. The pumpkin carving kits you get there have fat, wide pumpkin saws with sparse teeth, and they’re not very good. A better recommendation is to buy one of the nicer kits on the day after Halloween, when you can find them marked down even more than Halloween candy.)

To make your own template, though, you only need a few of things: A source picture that already has a pretty high contrast, any basic photo editing software that has brightness and contrast controls, and a bit of imagination/artistic enthusiasm … but not much.

This is the picture I chose for this year’s Batman template:

Batman template picture candidate

Batman pictures are generally good, anyway, because they typically have very high contrast and a lot of great shadows. If I’d looked for more than 12 seconds for a source picture, I would have found hundreds more to choose from. These were also contenders, and would have had the advantage that I could have skipped the photo-editing step:

High contrast picture practically ready for carving

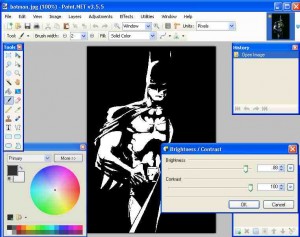
After choosing the source picture, open your favorite photo editing software (I like the free Paint.NET software) and play with the contrast and brightness settings. I normally crank the contrast to the very highest level, and then I play with the brightness in the 80% to 100% range. This is what I got out of my source picture:

Editing Contrast and Brightness settings

What you’re looking for is a lot of connected black areas, with enough interesting white areas to be able to make out recognizable details.

With this particular template, this was as far as I actually ended up going. I didn’t need to do any more. I had to make some changes on the fly (like completing the bottom of the chest-symbol oval, connecting the dark area of the mouth to the rest of the dark area, etc.), but I just printed this off and went with it.

What I normally do, however, is print out this picture, place some tracing paper over it, and trace the template out. Along the way, I make sure that all dark areas are in some way connected. Any black areas that are not connected, obviously, will fall out when you carve the white areas around them.

Here’s the Iron Man stencil I used the other year. I ended up only using the top half or so:

Iron Man Jack-o-Lantern pumkin stencil template

Iron Man Jack-o-Lantern stencil template

Anyway, that’s about it. I did the large Batman symbol freestyle at the end, and that’s why it suxx0rz, but it works well enough.

Remember to cut away the small, detailed, delicate parts first, and the big wide cut-aways last. Here are some of my past Jack O’Lanterns from my super hero series. Some are cut in real pumpkins, some are cut in foam pumpkins so I can keep them for a while. (When cutting foam pumpkins, use a very fast sawing motion with the pumpkin saws, and don’t push too hard.)

Batman Jack-o-Lantern pumpkin

Batman Jack-o-Lantern pumpkin

Superman Jack-o-Lantern pumpkin

Superman Jack-o-Lantern pumpkin

Captain America Jack-o-Lantern pumkin

Captain America Jack-o-Lantern pumkin

Spider-Man Jack-o-Lantern pumkin

Spider-Man Jack-o-Lantern pumkin

Iron Man Jack-o-Lantern pumpkin

Iron Man Jack-o-Lantern pumpkin

How to cheat at knitting

datePosted 1:11 PM, October 28th, 2010 by MarkleB

I’m now adding Knitting alongside Guitar Playing and Balloon Animal Twisting for things I’ve learned for my son.

Technically, I learned how to knit about five years ago when I stole a knitting book and needles from my mother. (These have not been returned.  She can deal with it.) I got about a dozen rows into a sweater and decided that sweaters were a terrible first project, homespun yarn is a terrible first fiber, and the Xbox has a higher return-on-investment if my investment is only going to last for a few hours.

My opinion on the ROI was reversed, however, when my mother-in-law met her grandson.  She bestowed upon him two of the most gorgeous cardigan sweaters I’ve ever seen in my life.  Gorgeous hand-knit items aren’t really new to me, as literally everybody in my family besides me (before this month) either knits or crochets.  (My dad knits, my brother crochets, and my mother and two sisters do both, though I think they all prefer crochet.) For some reason, these sweaters were what inspired me to finally start creating.

Well, the sweaters and his mobile.  My sister crocheted an incredible mobile for my son.Crocheted by his Auntie Brenda I think I got jealous that he had such amazing hand-crafted gifts from both sides of his family, but nothing from his own mum and dad.

I picked up that same stolen knitting book and those same stolen needles, and started making a baby afghan.  It’s a little ribbed blanket with a simple pattern, and it’s going well … but taking a loooong time.

While I was looking for yarn to use at the Walmart, Gemma saw a Knifty Knitters round loom set. She asked me what it was and how it worked. When I described it to her, she excitedly told me that she’d had a small spool knitting loom as a child, and loved it. Apparently she’d been wanting to knit something for our son, too, but didn’t feel like she could develop the skill to pick up needles and create something.  (She’d gotten as far as casting onto a needle, then knitting one row four or five times before ripping and starting over, and over, and over.)

We bought the looms, and about three hours after we got them home, she’d already completed Devon’s first hat! In the meantime, I’d had about 10 days with his blanket, and it wasn’t even a foot long. Gah!

The next day, Gemma had completed a hat for herself, and was planning other projects. I felt like I was making no progress on my baby blanket, so I went to the store to buy some new yarn, once again stole knitting implements (this time one of her looms) and started a scarf.

It took 10 days, but it’s done and it’s fantastic and I don’t care if it’s cheating. I’ve found some techniques on the Internet and figure that I can get the time on these scarves (even at 8 to 9 feet long) down to three to five days.  Even with an infant, I have plenty of time to work on them while mummy is nursing our son.

I’ll have more pictures of the things I’ve created after Thanksgiving (which is when we’re celebrating half of our Christmas with my family in Utah), after I’ve given them to their intended recipients. The loom is FAST and easy.

Meanwhile, I continue the slow, plodding work on the baby blanket. I hope to be done with it by the time real Christmas rolls along. Although I’m happy with the work that the looms turn out, the items made with needles are the ones that are exciting me. I can’t wait until I’m done with all of the Christmas items, so I can turn my attention to knitting socks in the round using the Magic Loop technique, a new baby blanket for an expecting family member, and eventually sweaters for the whole family.  Just probably without homespun yarn.

Three fast, easy and cheap geek projects!

datePosted 5:23 PM, July 3rd, 2010 by MarkleB

I’m excited about this entry, because it’s a whole bunch of really fast, really easy and really cheap projects for the beginner geek in each of us.

None of these are quite easy enough for a child to do on their own, and at least one part of each of them should have parental supervision.  Which is a good thing, because it means more time working on something together.

These are the three projects: Hover-crap, Bristlebot and Slurpee Cup Lamp.

Hover-Crap

  • Time: About 2 minutes
  • Cost: Pretty much made out of garbage, so close to free
  • Most difficult part: Using a hot glue gun

The Hover-Crap comes to me out of making lemonade from lemons.  During the May, 2010 Woot!-off, I got the most generic, monetarily worthless junk in my Bag of Crap.  Which is not a bad thing. Quite the opposite, in fact, I look forward to it, so that I can find useful stuff to do with it … Like this.

One of the items (or six, depending on how you look at it) was a six-pack of Disney Flix Camera Cinderella Director Packs. It’s a whole mouthful to say: worthless CDs.  They’re software add-on packs for the Flix Camera, and absolutely, completely worthless without it.

I wondered if there might not be something useful to do with them, and Jeus linked me to a YouTube video.

Follow the YouTube link above, and that’ll show you everything you need.  Basically, a balloon, a CD, the push-top lid of a sports bottle from a bottle of water and some glue.  The video suggests super glue, I like a glue gun.  I always have problems with super glue and walk around with my fingers glued together for a few hours after I finish with a project.

Most of the 2 minutes of this project is opening the bag of balloons, choosing a color and blowing it up. I decided to color-coordinate with pink.  In a refrain you’ll hear a lot from me in my projects, I picked up the bag of balloons at the dollar store (Dollar Tree this time), and you really shouldn’t be paying more than a few pennies per balloon.

The result:


I’m happy enough with it!

Bristlebot

  • Time: Between 5 and 10 minutes
  • Cost: About $2
  • Most difficult part: Soldering two wires to a motor

The Bristlebot was brought to me for the same reason as the HoverCrap. In my Woot!-off Bag of Crap from May, I also received five button-cell CR2016 batteries. Oddly enough, if they had been CR2032s, I would have had a use for them and wouldn’t have gone looking.

Do not solder wires directly to the batteries. They will in all likelihood explode.  In the non-cool way.

Anyway, I ran across one of the coolest-yet-quickest projects on the Internet: The Bristlebot.

Here’s what you need:

  1. Any 1.5v to 4.5v button cell battery, like a CR2016 or CR2032 watch battery (I found a 3-pack of CR2032s at the 99¢ Only Store)
  2. A toothbrush with slanted bristles that you don’t mind mangling
  3. Masking tape
  4. Two bits of wire
  5. Solder/soldering iron
  6. A miniature vibrating motor

This last item is the hardest to come by. Everyone on the Internet says to get them out of old cell phones or vibrating pagers. That would work, but who actually has those lying around? (Okay, I do, but I’m odd.) So eBay may be an idea, but the people on eBay have caught onto the idea that people are using these for Bristlebots, and they charge about $3 per motor. I had great luck with allelectronics.com.  They have multiple motors that fit this bill for $1.25 currently. (I wouldn’t go for the $1 one, as it looks like it would need to be mounted on-edge to get the vibration necessary.)

Here’s a picture of the motors I bought, a two-pack of angled toothbrushes from the dollar store (I later found four-packs, so just 25 cents each for this part of the project), and what I was hoping would be a fantastic steal, a vibrating toothbrush.  I figured it would have a vibrating motor in it, and it did, but it turned out to be HUGE. (Note: If you can get the unbalancing weight off it, this motor is PERFECT for the BeetleBot project … Which I’ve completed, but haven’t written up yet.) It also came with a battery, making it almost as good a buy as the personal fans I bought there to get the motor.

The blog I found the project on tells you to use double-sided mounting tape to mount everything to the top of the toothbrush head, but I found that a half-strip of masking taped worked fine … The double-sided mounting tape I found was about $3.50, and that’s about $2.50 more than I was willing to spend.

Anyway, just follow the directions in the Bristlebot link above.  Mostly I’m just pointing out where you can get things.  Oh, and showing my results video:


I LOVE THIS THING!  How cool is that?  The back of my Bristlebot has raised bristles, which adds to its random nature and spinning around.  If yours does the same thing and you don’t like it, just trim them all off flat.

Slurpee Cup Lamp

  • Cost: Anywhere from about $7 to $30
  • Time: 15 minutes
  • Most difficult part: Using a drill (on some) and hot glue gun

This project comes to me from my sister Brooke, who has her own geek blog over at http://psyfygirl.blogspot.com/.  It’s TV Geek Girl Chic.

She made one of these out of a collectible Slurpee cup with a Darth Vader lid.  Obviously with that one, there’s no need to drill a hole in the top, but you still need one in the bottom.  Also note that collectible Slurpee cups had harder lids in 2005 than they do now, so maybe look around for something else to use.  Old Coke bottles (like they still sell Mexican Coca-Cola with real sugar in) or interesting wine bottles would work, and is what the lamp kits are for, but I wouldn’t want to be the one drilling holes in the glass.  But there’s really no end to what you can do this with.

Here’s what you need:

  1. Bottle Lamp Kit — I found one at Walmart for $3 or $4.
  2. Collectible Slurpee Cup, bottle, etc. (you’ll see the one I found below)
  3. Lamp shade (K-Mart has smallish ones fairly cheap)
  4. Hot glue gun
  5. Probably a drill

Really, all you really need for this is to drill holes in the bottom of whatever you’re using, the top if necessary, seal things up with the glue gun, and following the directions that come with the bottle lamp kit.

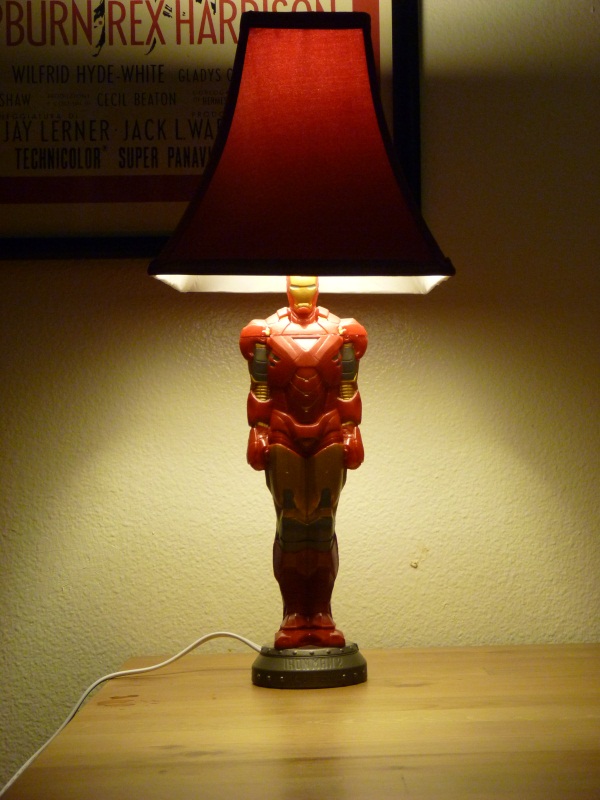
In about 15 minutes, here’s what I made for our son’s nursery, and yes, that’s actually a collectible Slurpee cup.  (He’s due in ten more days.  Could be any minute, now!)

Rambling, confusing entry about my home network

datePosted 10:49 PM, July 1st, 2010 by MarkleB

Rather than a new project, I’m going to post on a past project that mostly failed. Hopefully somebody else can learn something.

A couple of months ago, I decided to give my home network some structure. I put a manual IP Address Management list into place (since I have nowhere near enough devices to need an actual IP Address Management solution), re-IPed all of my servers, and eventually put a new third-party firmware on my home router.  Well, and even more third-party firmware than was already there. More on that in a bit, since that was the bit that failed.

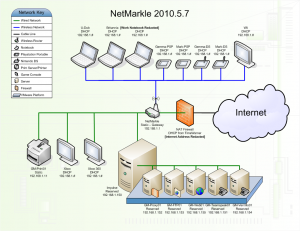
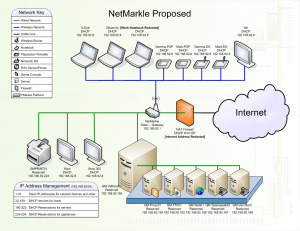
Here’s my network as it existed before the re-structure:

Home network as it existed prior to May 7, 2010

It should mostly make sense if you look at the Network Key.  The smaller servers on the blue box are virtual servers running on Impulse, my physical server.  If you’re not yet familiar with virtual servers / virtual machines, think of them as many different computers running as software on one computer.  Because that’s what they are.

The two things I most wanted to fix was to use anything other than the 192.168.1.0/24 network (which I didn’t really fix very well, but technically am avoiding) and to use DHCP reservations instead of static IPs for my servers.

Why do I prefer DHCP reservations?  First, it puts my fake IP Management into the DHCP server, rather than on a .PNG graphic of a Visio document.  Most importantly, though, it centralizes the configuration of my IP addresses.

Moving from static to reserved DHCP addresses (which was the first step of my network re-design), it took me a little under an hour to pre-configure the DHCP server for each MAC address, log into each one of the servers, change the IP address assignment to Dynamic, get the new address, check the DHCP server, etc.  When it was time for me to actually switch to the new IP addresses, though, it took about 8 minutes.  I prepared a few days ahead of time by lowering my DHCP lease time from 1 day to 5 minutes.  Then I changed the IP address reservations, waited for the leases to expire and re-grab the new address, and then set the DHCP lease time back up to 1 day.  I’m never going back to static on anything that will DHCP.

Home network as it ... isn't quite now. But mostly.

So here’s mostly how the network looks now. It’s sadly already outdated, with new virtual servers and a netbook that my wife bought our unborn son as a baby-monitor / digital mobile / grandparental (not a word) spying device.  As you can see by the new IP Address Management section, I left 30 spaces open for static IPs, but in a home network there are very few cases where that’s going to be necessary to use.

The other week was when I “upgraded” to the third-party firmware for the router, DD-WRT.  DD-WRT is a pretty popular firmware that can open up a lot of power and control for your router. It’s just a tiny Linux that runs on your router, has drivers for the wired and wireless communications ports (and USB ports for those that have one), a lot of networking daemons / services running on it, and a web-based configuration page.  I’d planned on loading this firmware on my router a year ago when I got it, but they didn’t have drivers supporting the Trendnet TEW-652BRP until a few weeks ago.

Instead, I had loaded the DLink DIR-615 (Rev C1) firmware onto it.  The Trendnet 652 has identical hardware to the DLink 615 (at least these revisions), so the firmware is interchangeable.  The DLink firmware is FANTASTIC.  It has great control over port forwarding, port aliasing, port triggering, QoS, access control, filtering, basic routing … It filled ALMOST all my needs.  There are two things that I needed it to do that it couldn’t.  First, I wanted it to be my DNS server so I wouldn’t have to build a virtual server just to do that (which is still on my To Do pile).  Second, it wouldn’t recognize MAC addresses if the first two digits weren’t 00.  Many new NICs have MAC addresses that begin with 40 or 4Something, and since they weren’t recognized, I couldn’t set up DHCP reservations for them.

So I installed the DD-WRT firmware.  What does it do?  Well, it does everything listed above, plus a lot more.  For example, out of the box, you can configure it to work as a public WiFi hotspot, and even allows you to generate revenue within a couple of minutes of turning it on this way. It does a fair job of logging, too, but I far prefer Tomato (another third-party router firmware) for logging.  Since it’s running Linux, you can do most anything with it that you do with Linux.  For the short time I had it running, I really loved using it as an SSH server open in my home network that wasn’t dependent on my internal network functioning.  I especially love that you’re not bound by the short-comings of the web interface, and can manually edit config files.  It puts consumer routers a step closer to professional routers.

Unfortunately, it had issues.  About once a day, it would shut off all Internet-side communications. Some research indicated this happened if there were a LOT of open Internet connections, like I’m apt to have while doing BitTorrent transfers.  My BitTorrent is up pretty much 24/7 (I think we calculated that I’m uploading about 200 GB/month, throttling down to 80 KB/s), so this is an issue for me.

I found some configuration work-arounds, and plugged them in.  No sooner had I done this when I noticed that my Internet speed dropped drastically.  It’s normally around 20 Gb/s, and it was instead around 1 Gb/s.  I took the changes out, rebooted the router, and the speed tests were still the same.

Out of desperation, I decided that between the initial locking problem and then the speed problems, the firmware was more bother than it was worth, and I re-loaded the DLink firmware.  (Actually, a new version of the DLink firmware. I’d checked over and over from the web interface to download an updated firmware, but it never found one. You apparently have to download it and put it onto the router manually.)

This still didn’t fix the speed issue.  In the meantime, though, I’d scrapped all of my router configurations.  I had backed up the configuration for the DLink firmware, but the updated version didn’t like the old configurations.  I had to enter it all by hand, all from memory.  It took a couple of hours.

The problem?  Time Warner Cable/Road Runner was having a problem.  A massive problem, where they had to rent bandwidth from a competitor to get any connectivity at all to their SoCal customers.  I’d done all that for nothing.

So I’m still on the updated DLink firmware, even though I suspect DD-WRT would work fine for me now.  Just haven’t put aside time to have my network down for that long.  The new firmware recognizes newer MAC addresses without a problem, so I’m just out my DNS server.  I have to decide if it’ll be easier to build my own, or go back to DD-WRT firmware.

Welcome to Good Idea at the Time!

datePosted 12:31 AM, June 18th, 2010 by MarkleB

This is a pretty good day for my first post, because it’s a good “projects” example day.

First of all, how cool is this domain name?  Completely shocked when I saw it was still available.  I’ve been thinking for a while to start two blogs, one for geek projects (name never determined) and one for my bad parenting (called worseparenting.com).  I have no idea what badparenting.com used to host, but it’s a domain squatter now.  When I found this domain available, I realized it could be used equally well for both blog ideas.  Feel free to take worseparenting.com and make me look like the amateur I am at being a bad parent.

My project for today (and yesterday, and now tomorrow) was supposed to be a Beetle Bot.  This should be a one-evening project.

The lesson learned the hard way last night was: Do not use Bondo to hold your beetle robot together.  Feel free to rebuild a Volkswagen Beetle with it, instead.

Tonight, I couldn’t even get to the project until much later than expected. As I was closing and locking the door of my car, the door’s lock fell inside the door.  (Yeah, I A) have manual locks and B) have to lock the car door from the outside using the key, by manufacturer design to ensure I don’t lock it in there.)

On the bright side, I’ve always wondered how hard it is to get inside a car door, with how entryless (not a word) their construction seems.  Now I know.  I also know that it’s not getting into the door that’s the hard part.

A while ago, I had one broken bolt in that car cost in the neighborhood of $600.  It appears to have happened again, but this time it cost me around $1.50.  (I don’t remember how much, but I know I used a credit card to pay for it. So I can find out exactly how much later. See how I totally paid for a $1.50 item with a credit card on purpose and not because my brain gets easily fried?)

Anyway, that set my robot building back an hour and a half.  I’d picked up the epoxy and this time I got the robot entirely built … But discovered I should have done more testing first.

See, the smallest motors that allelectronics.com sells are 1.5 Vdc mini, mini, mini motors.  Which is great, since the Beetle Bot Instructions calls for 1.5 Vdc motors.  Except that they’re ACTUALLY 1.5 Vdc, and most AA and AAA batteries these days are closer to 1.3 V than 1.5.  So I could power one motor, or the other, but not both.

Solution?  Like so much else in the world, the dollar store. They had little hand-held personal fans that have the proper 1.5 Vdc motors that will (hopefully) work with slightly underpowered batteries.  Also?  They have cool little mini-frisbees in three or four packs (depending on which comic book character you want on them) which are perfect for the top shell to these Beetle Bots.  So much great stuff there to break to pieces and abuse.

So in one night, my project count is:

  1. Unexpected car project
  2. Failed robot project
  3. Domain purchased, blog created, and premiere post put up!

Even though it’s taking me past midnight to get all this done, at least I get to end on a success.  Looks like the Beetle Bot and the Bristle Bot will have to end up being weekend projects.