I’m excited about this entry, because it’s a whole bunch of really fast, really easy and really cheap projects for the beginner geek in each of us.
None of these are quite easy enough for a child to do on their own, and at least one part of each of them should have parental supervision. Which is a good thing, because it means more time working on something together.
These are the three projects: Hover-crap, Bristlebot and Slurpee Cup Lamp.
- Time: About 2 minutes
- Cost: Pretty much made out of garbage, so close to free
- Most difficult part: Using a hot glue gun
The Hover-Crap comes to me out of making lemonade from lemons. During the May, 2010 Woot!-off, I got the most generic, monetarily worthless junk in my Bag of Crap. Which is not a bad thing. Quite the opposite, in fact, I look forward to it, so that I can find useful stuff to do with it … Like this.
One of the items (or six, depending on how you look at it) was a six-pack of Disney Flix Camera Cinderella Director Packs. It’s a whole mouthful to say: worthless CDs. They’re software add-on packs for the Flix Camera, and absolutely, completely worthless without it.
I wondered if there might not be something useful to do with them, and Jeus linked me to a YouTube video.
Follow the YouTube link above, and that’ll show you everything you need. Basically, a balloon, a CD, the push-top lid of a sports bottle from a bottle of water and some glue. The video suggests super glue, I like a glue gun. I always have problems with super glue and walk around with my fingers glued together for a few hours after I finish with a project.
Most of the 2 minutes of this project is opening the bag of balloons, choosing a color and blowing it up. I decided to color-coordinate with pink. In a refrain you’ll hear a lot from me in my projects, I picked up the bag of balloons at the dollar store (Dollar Tree this time), and you really shouldn’t be paying more than a few pennies per balloon.
The result:
I’m happy enough with it!
- Time: Between 5 and 10 minutes
- Cost: About $2
- Most difficult part: Soldering two wires to a motor
The Bristlebot was brought to me for the same reason as the HoverCrap. In my Woot!-off Bag of Crap from May, I also received five button-cell CR2016 batteries. Oddly enough, if they had been CR2032s, I would have had a use for them and wouldn’t have gone looking.
Do not solder wires directly to the batteries. They will in all likelihood explode. In the non-cool way.
Anyway, I ran across one of the coolest-yet-quickest projects on the Internet: The Bristlebot.
Here’s what you need:
- Any 1.5v to 4.5v button cell battery, like a CR2016 or CR2032 watch battery (I found a 3-pack of CR2032s at the 99¢ Only Store)
- A toothbrush with slanted bristles that you don’t mind mangling
- Masking tape
- Two bits of wire
- Solder/soldering iron
- A miniature vibrating motor
This last item is the hardest to come by. Everyone on the Internet says to get them out of old cell phones or vibrating pagers. That would work, but who actually has those lying around? (Okay, I do, but I’m odd.) So eBay may be an idea, but the people on eBay have caught onto the idea that people are using these for Bristlebots, and they charge about $3 per motor. I had great luck with allelectronics.com. They have multiple motors that fit this bill for $1.25 currently. (I wouldn’t go for the $1 one, as it looks like it would need to be mounted on-edge to get the vibration necessary.)
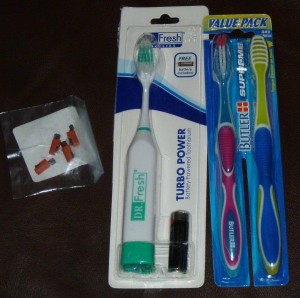
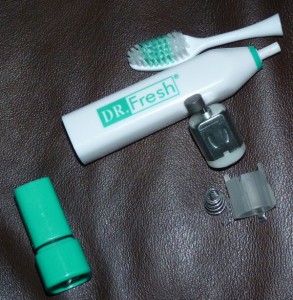
 Here’s a picture of the motors I bought, a two-pack of angled toothbrushes from the dollar store (I later found four-packs, so just 25 cents each for this part of the project), and what I was hoping would be a fantastic steal, a vibrating toothbrush. I figured it would have a vibrating motor in it, and it did, but it turned out to be HUGE.
 (Note: If you can get the unbalancing weight off it, this motor is PERFECT for the BeetleBot project … Which I’ve completed, but haven’t written up yet.) It also came with a battery, making it almost as good a buy as the personal fans I bought there to get the motor.
The blog I found the project on tells you to use double-sided mounting tape to mount everything to the top of the toothbrush head, but I found that a half-strip of masking taped worked fine … The double-sided mounting tape I found was about $3.50, and that’s about $2.50 more than I was willing to spend.
Anyway, just follow the directions in the Bristlebot link above. Mostly I’m just pointing out where you can get things. Oh, and showing my results video:
I LOVE THIS THING! How cool is that? The back of my Bristlebot has raised bristles, which adds to its random nature and spinning around. If yours does the same thing and you don’t like it, just trim them all off flat.
- Cost: Anywhere from about $7 to $30
- Time: 15 minutes
- Most difficult part: Using a drill (on some) and hot glue gun
This project comes to me from my sister Brooke, who has her own geek blog over at http://psyfygirl.blogspot.com/. It’s TV Geek Girl Chic.
 She made one of these out of a collectible Slurpee cup with a Darth Vader lid. Obviously with that one, there’s no need to drill a hole in the top, but you still need one in the bottom. Also note that collectible Slurpee cups had harder lids in 2005 than they do now, so maybe look around for something else to use. Old Coke bottles (like they still sell Mexican Coca-Cola with real sugar in) or interesting wine bottles would work, and is what the lamp kits are for, but I wouldn’t want to be the one drilling holes in the glass. But there’s really no end to what you can do this with.
Here’s what you need:
- Bottle Lamp Kit — I found one at Walmart for $3 or $4.
- Collectible Slurpee Cup, bottle, etc. (you’ll see the one I found below)
- Lamp shade (K-Mart has smallish ones fairly cheap)
- Hot glue gun
- Probably a drill
Really, all you really need for this is to drill holes in the bottom of whatever you’re using, the top if necessary, seal things up with the glue gun, and following the directions that come with the bottle lamp kit.
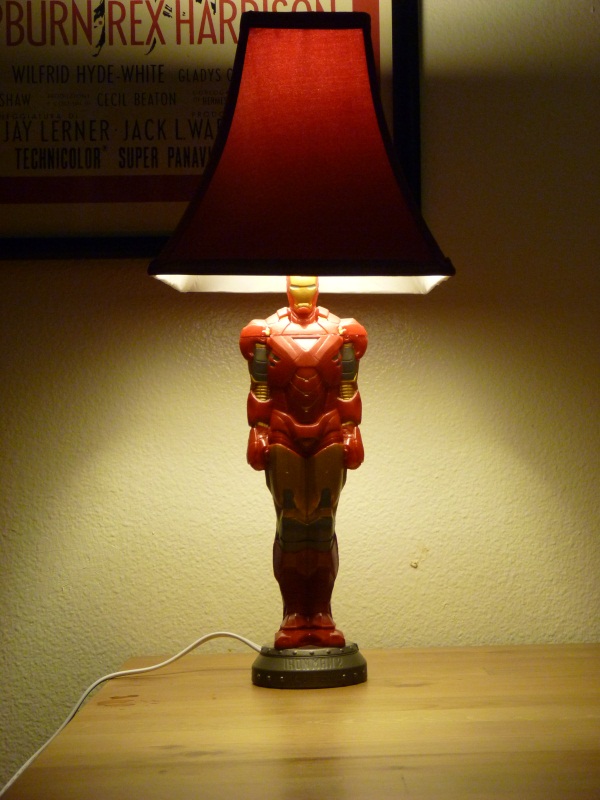
In about 15 minutes, here’s what I made for our son’s nursery, and yes, that’s actually a collectible Slurpee cup. (He’s due in ten more days. Could be any minute, now!)

